Showing posts with label sewing. Show all posts

Saturday, July 18, 2020

Vintage Project Spotlight: Harper's Bazar 1925 Inspired Blouse

This vintage project spotlight is on my Harper's Bazar 1925 inspired blouse.

  The inspiration for this blouse is from a fashion plate in Harper's Bazar magazine from January 1925.  The original design is from Nicole Groult, a French fashion designer who is sister to the famous designer Paul Poiret.  What I liked about this design was its fairly simple construction - kimono sleeves, loose and straight shape, with the only details being a V-necked tie collar and hip band.  This is my favorite type of blouse from this era - the drape-y nature and shape are comfortable, and it's one of the more flattering of the 1920s fashions.


  I used the bodice pattern from Simplicity 8506 to draft a very simple and boxy kimono shape.  For the tie collar, I used the long tie collar pattern piece from my 1923 dress and shortened it.  The hip band is just the bottom of the blouse pattern measurement, doubled, then doubled again, and about 5 inches wide(I wasn't too worried about exact measurement of the width, as long at it would turn out at least 2 inches wide).

The pattern(not to scale).  Front and back are the same except for the neckline, the back shown as a dotted line.  There are no closures, the v-neck is large enough to pull over the head.

  The original design is a multi-colored large floral print on black in rayon crepe.  I liked the look of it in black and white in the plate, so I went for that color scheme and happened upon a print that was somewhat close(large floral, but not as spread apart) and same type of fabric.  I also bought solid black rayon crepe for the tie collar and hip band, omitting the leaf pattern on the band.

The fabric.

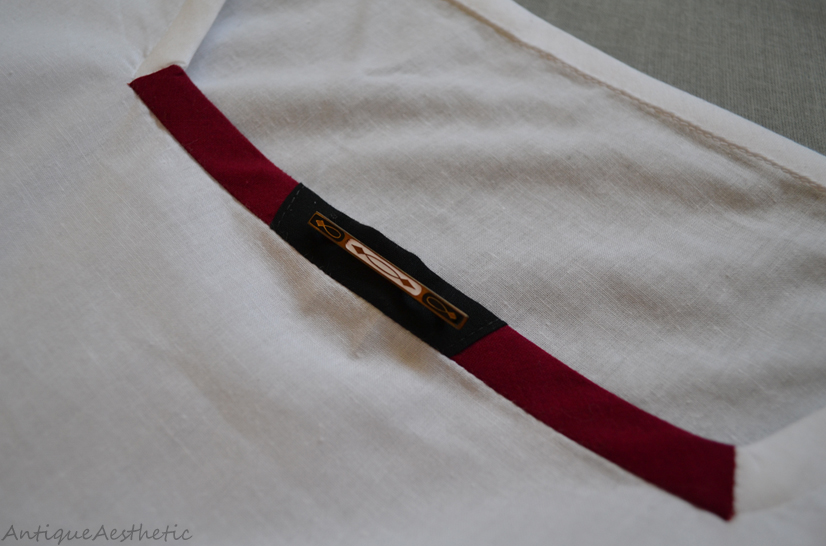
  I finished all the seams by hand overcasting, and finished the inside collar and hip band by hand as well.  I'm not really a fan of bows, so I made the tie just long enough to tie in a knot, and made a separate bow on a pin so I would have the most versatility.

And here's the finished blouse!


  I'm very pleased with the outcome of this blouse, since the entire process was basically an experiment.  It isn't exactly like the fashion plate, but I think I captured the feeling and drape - and it's so comfortable!  Worn with a black twill skirt(made by me), the bow pinned on, Mae shoes by American Duchess in black, and Besame lipstick in 1925 Forever Red.


...And a bonus:

  Another reason I like this type of blouse is that it can also be styled 1930s.  The same blouse and skirt, but tucked in and worn with 1930s gloves, Huxley shoes by B.A.I.T Footwear in black/white, a 1930s bar pin instead of the bow, white hat from Target, and Besame lipstick in 1933 Merlot.

Friday, September 20, 2019

Making a c.1923 Butterick Dress: The Reveal

  And here it is!  After two and a half weeks of work I finished Butterick 6962 circa 1923 open front dress with slip.

View of the front with all the accessories(including a matching band for my hat with a buckle).

View of the back - the belt slipped a bit so the spot where I tacked the pleats is visible.  I was so worried the pleats would just disappear when I took out the basting stitches, but was pleasantly surprised to see they still mostly hold their shape.

Color details.

Back collar detail.

Sleeve and front detail.

Front of slip neckline detail with brooch.

The things I've learned:
1) Tailor's tacks are both good and bad - they mark both pieces of fabric without needing to be washed out or risking staining the fabric, and using multiple colors instantly tells me what mark means what, but they are somewhat time consuming to put in and have the potential to fall out which can be annoying.
2) Pleats are only good in small doses - I used to prefer pleats to gathers, but these dress-length pleats were the devil to get even and to stay in place, hence all the basting.
3) Perforated patterns aren't nearly as hard as they seem - I'm sure in a pattern that comes with minimal instructions it would be difficult to translate what all the holes mean, so I'm glad my first attempt had a Deltor to hold my hand through the process, but I feel that the next vintage pattern I work on will not seem so scary now that I know a bit more about the use of perforations.

  Would I undertake a vintage pattern again?  Absolutely, and I hope I can find some more, perhaps 1930s, patterns to make in the future.


Shoes: American Duchess 'Mae'
Gloves/parasol: Amazon
Purse: not vintage, but from an antique store
Hat: Target
Buckle on hat: vintage
Brooch: vintage, circa 1920s-1930s
Sunglasses: Zenni, prescription

Friday, August 23, 2019

Making a c.1923 Butterick Dress: The Construction

  Before delving into the making of this dress, I thought I'd take a tip from Vintage on Tap's video about tracing pattern pieces and decided to trace all my pieces so I wouldn't have to worry about being too rough on the original pattern.  Patterns at this time were bought by individual size, so there was no cutting, but I still didn't want to risk staining it or putting pin holes in it.  I traced my pattern onto newsprint paper since it's cheap, easy to find, and can be bought in large, 18x24" sheets.


Not sure if 1920s thread spools and vintage compacts are the best pattern weights, but they worked.

To show how similar the original pattern piece is to my copy - this requires patience, since the last thing I wanted was distorted pieces which would ruin the entire garment.

  The only pieces I had to make for myself were for the slip.  I used the basic bodice from Simplicity 8506 Vintage 1930's Sleeves pattern and studied the few images of the slip from the envelope to try my hand at drafting my own pattern pieces.

The missing slip image from the envelope, and my bodice pattern.  I guess those strange double underarm darts were not so strange in this time period.

Drafting the slip to the best of my ability - with of course my trusty vintage compacts as pattern weights again.(Unfortunately I didn't get any other photos of this process - I basically drew the shape of the slip from the envelope using the bodice piece as a guide to get the darts, armholes, and neckline correct, and made sure it would be wide enough to not only pull over my head, but fit my hips.  Then I made a matching back piece.)

  After making copies of all my pieces, it was time to cut out my fabric.  I used a permanent press bleached muslin, black calico, and burgundy calico fabric, all 100% cotton for a few reasons:  low cost(since I wasn't too sure how it would come out), breath-ability(it's summer after all), and ease of sewing(non-stretch fabric is wonderfully easy to sew).

The fabric.

  As if this wasn't already a learning curve using the perforated pattern, I thought I'd try my hand at tailor's tacks, which my 1927 sewing book recommends.

Tailor's tack instructions.

My rainbow of tailor's tacks.

  Once my pieces were tacked I cut them out and started the part of construction that took the longest - the pleats.

Pleats basted - they go all the way down the dress starting at the shoulder, on both sides and front and back.

Pleats sewn at the top on front and back.

Since the pleats were only sewn part of the way down(about 8 inches), I finished them as is suggested in the book, thread pulled to the back and hand knotted like finishing a dart.  I also cut out some of the bulk near the shoulder seams to make finishing easier - as is also suggested in the book.

  After the arduous pleating, I stitched up the side and shoulder seams and tackled the inset sleeves, which for once were not so tedious(only an inch of ease, unlike other modern garments I've tried that have at least an inch and a half of ease - what a difference!)

Sleeves in.

  With the sleeves in, it was now time for the cuffs, collar, and belt in the red fabric, all which in themselves are simple, but made more complicated by me because of my want of black detailing(to match my 1920s reproduction black shoes).

Cuffs, collar, and belt all cut out and marked.

Some of the black detailing - self made pattern and cut out pieces.

  When the cuffs and collar were on and the belt done, the only thing left was the slip.  I used the same white fabric as the outer dress, bound the armholes and three quarters of the neckline with white and used the red and black for the front binding on the neck since it was the only part showing.

  Now that most of the slip and the outer dress were complete, I finished the seams, hemmed the slip first to make sure the outer dress hung lower, then hemmed the outer dress.

Seam finishing - I folded each side of the seam allowance inward towards the stitching and overcast stitched them together, and I did this on the entire garment.

  All that was left is to take out the basting stitches in the pleats and iron them to death.

I originally bought this Art Deco letter opener to turn out points in garments, but it also works very well to quickly take out basting stitches.


(This is part two of three documenting my journey into making this dress.  Check back next time for the reveal!)

Friday, July 26, 2019

Making a c.1923 Butterick Dress: The Pattern

  As a vintage fashion enthusiast, I'm always trying to add pieces of clothing inspired by my favorite decades into my wardrobe for events and for everyday life.  I find that there are very few, if any, reproduction clothing companies that specialize in those eras, being the 1920s-1930s, and the ones that do exist are way above my price range.  To combat this problem, I've bought a few reproduction patterns in an attempt to make the items myself in my particular style at a reasonable price.  I had always held off on buying real vintage patterns, mostly because of the chance some pattern pieces may be missing, and also, again, because of the understandably high prices(these patterns are almost 100 years old at this point).

  While venturing down the rabbit hole of Etsy I happened upon a circa 1923 Butterick pattern, in my size, for a steal, and I couldn't pass it up.  The pattern is for an open front over-dress closed with a belt, with a slip underneath, a common style of the period.


The pattern - I don't believe it has ever been used except for the slip, which would explain its disappearance.

  The pattern, as was expected, was missing the two pieces for the slip.  Luckily for me, I have a reproduction 1930s bodice pattern that is surprisingly similar to the top of the slip, so I figured I could, with some tweaking, make my own version of the slip pattern and be able to construct the dress almost as if nothing was missing.

  To make this experience as authentic to the 1920s as possible, I also used Art of Dressmaking by Butterick from 1927 to assist me in techniques from the era, and used this book exclusively to answer any questions about construction I might have had.

Art of Dressmaking, Butterick, 1927.

  And finally, since summer is here, I decided on making a lightweight white dress based on this image I found on Pinterest:

Of course this isn't the same style, but I loved the white dress with black and red detailing and wanted to emulate those details on my dress.

(This is part one of three documenting my journey into making this dress.  Check back next time for the construction!)

Friday, November 16, 2018

My Favorite Antique - That I Don't Collect


  Whenever I go in an antique store, no matter what I'm initially looking for, there is always one item I have to take time to study and admire - the sewing machine.


  I've always had a soft spot for Singer sewing machines in particular. The first machine I ever used was my mother's 1970-80s Singer when I was very young, and even though it was fairly old, it always worked beautifully. I only ever tried one other brand, and it paled in comparison to that trusty old thing.  When I needed to buy a new machine about two years ago, I couldn't help but buy a Singer, and it's been just as wonderful as my mother's.

Singer Corporation is an American sewing machine company, starting in 1851 by Isaac Merritt Singer.  Isaac, interestingly, was a scandalous figure, having multiple wives and mistresses, to which he had 24 children.  Because of the notion that sewing machines were to be sold to respectable homes, he was convinced to leave the country so that his infidelities wouldn't affect his booming company.  He died in 1875, but left a legacy of Singer sewing machines that are still around today.

  My love of Singers increased when I started to antique, and I was able to see so many varieties going all the way back to the 19th century. The vibrant paint, heavy ironwork, and decorative metal panels make these machines so beautiful to look at. And the best part is that they almost always work! I know this because I can't resist turning the needle wheel on every machine I see, and if that wheel works, there's a good chance it can be restored(however the skill needed to accomplish this, I don't yet have).

  Antique sewing machines are not only found in antique stores, mind you. Sometimes I'm fortunate enough to see them in museums and historic houses, so on those occasions I make a hobby of photographing them, even if they aren't Singers. Here's what I've seen so far:

Grand Traverse Lighthouse, Traverse City, MI.

Hackley & Hume House, Muskegon, MI.

The Elms, Newport, RI.

Roseland Cottage, Woodstock, CT.

Scolnik House, Muskegon, MI.

  Even though I'm sure I've seen many that were of a good price and could be used, I've never indulged in buying one. They're certainly too cumbersome to have multiples of, but with any antique, it's very hard to own just one. In the mean time, I'll admire them from afar, handle them when I can, and always be on the lookout for the one machine that will change my mind.


All Singer images are from my copy of Singer Sewing Library - No. 2: How To Make Dresses, The Modern Singer Way.